Time to Complete: 1-2 hours
Final Length: Customizable
2 pairs of pliers
Clasp of your choice
22ga 2.5 ID - 34 rings/in
20ga 3.0 ID - 26 rings/in
18ga 3.5 ID - 24 rings/in
18ga 4.0 - 20 rings/in
16ga 54.5.0 - 18 ring/in
14ga 5.5 - 12 rings/in
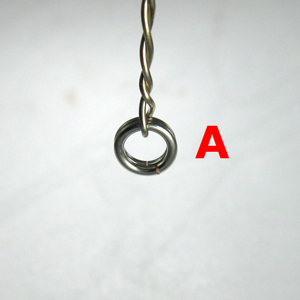
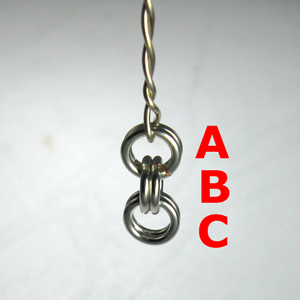
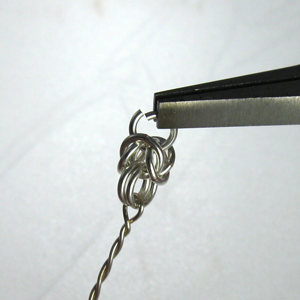
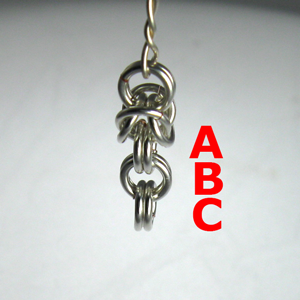
STEP 1: The Starter A
Close 2 jump rings, (pair A). Attach a small piece of wire to the end pair to create a handle. [For faster chain making, open jump rings and organize them in piles of six rings.] Size Selection: The following sizes can be used for Byzantine. 14ga 5.0mm ID (Extra Large) 16ga 4.5mm ID (Large) 18ga 4.0mm ID (First time making chains) 18ga 3.5mm ID (Standard) 20ga 3.0mm ID (Fine) 22ga 2.5mm ID (Micro Chain) -not for the faint of heart.
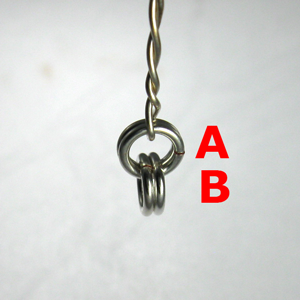
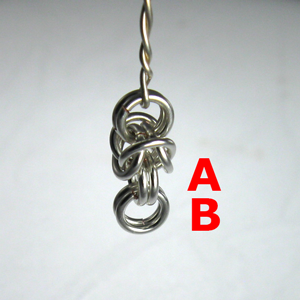
STEP 2: The Starter B
Attach 2 new jump rings to pair A.
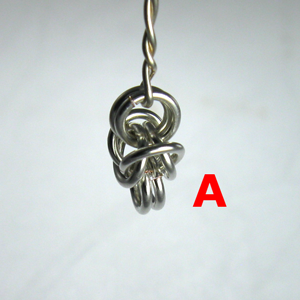
STEP 3: The Starter C
Attach 2 new jump rings to pair B.
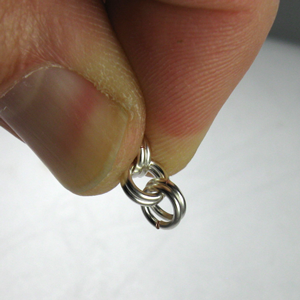
STEP 4: The Grip
Hold the starter by the wire and let the jump rings hang. Use your thumb and finger so that you pinch Pair A & B. This isolation technique will make it easier to build your chain. If you move your hand, only pair C should move back and forth.
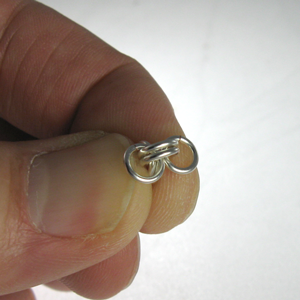
STEP 5: The Flip
Turn your hand so that you are pointing the starter at the ceiling. (C is now on top). Flip pair C open like the petals of a flower.
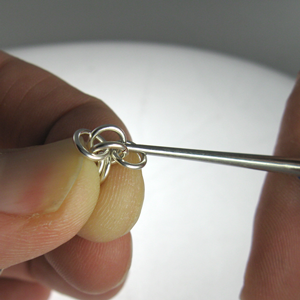
STEP 6: The Separatio
Using an Awl or pointed tool, separate the rings of pair B. If you lose your place start over (step 4: the grip) and focus on pinching pair A/B to keep the rings from moving too much.
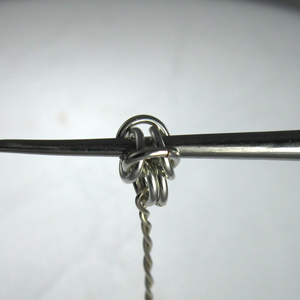
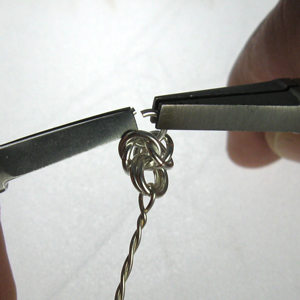
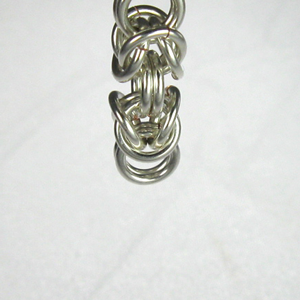
STEP 7: The Push
Push the awl into the chain. The link should appear like the photo. You have used all 6 rings and the pattern now repeats.
Are your six rings open and ready?

STEP 8: The Push - Reviewed
Should look like this.
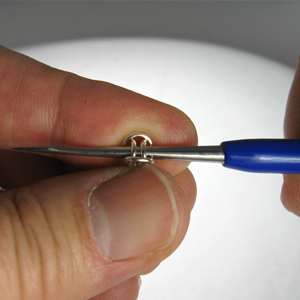
STEP 9: The Hold
Grasp the chain firmly. Prepare to remove the awl.
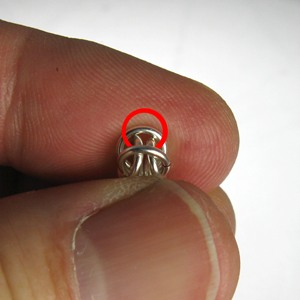
STEP 10: The Hold - Review
As you remove the Awl, maintain a firm pressure. This will keep the chain from collapsing while you pickup and add your next set of jump rings.
The Red shows the placement of the next ring
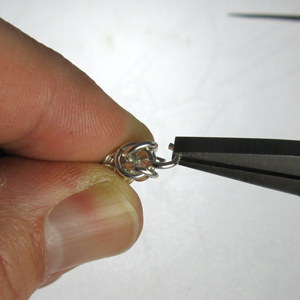
STEP 11: Insert New A
Insert a jump ring (new Pair A) onto the spot that was occupied by the awl. This may feel awkward at first, but you will quickly become proficient. I use a sweeping motion like setting a hook.
STEP 12: Insert New A - Review
Don’t put down the chain just yet. Reinsert the awl to hold your spot open. Whenever I need to put down my chain I always put the awl back in.
STEP 13: Close A and Add Another
Close the jump ring with a second plier. Work it back and forth with a slight inward pressure so there is no opening on the ring.
Don’t put down the chain just yet. Reinsert the awl to hold your spot open. Whenever I need to put down my chain I always put the awl back in.
Pick up another jump ring and place it next to the first
STEP 14: The New A
The pair of jump rings that you inserted in step 13 is now the new pair A (step 1)
STEP 15: The New B
Add two new jump rings to pair A.
STEP 16: The New C
Add two new rings to pair B.
REPEAT: Steps 4 - 16 and Repeat until desired length.
STEP 17: End Chain
When you are ready to end the chain. Perform the last FLIP and insert two new rings.
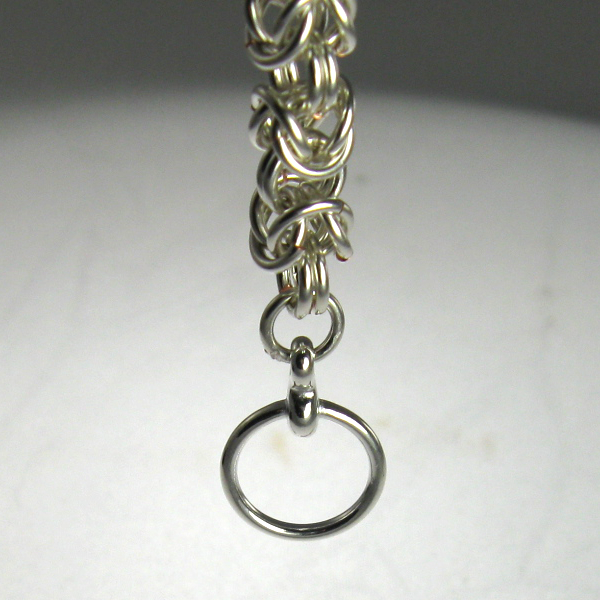
STEP 18: Add a Clasp
After the last flip, use a single jump ring to attach the clasp of your choice