Time to Complete: 1-1.5 hours
Final Length: Customizable
2 pairs of pliers
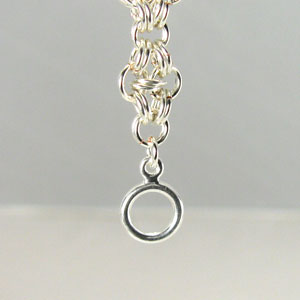
Clasp of your choice
20ga 3.0 - 5 per inch
STEP 1: The Starter
For this example we are using 20ga 3.5mm ID rings for the body of the chain and 20ga 3.0mm ID rings for the cross link.
We are going to start this project by making a simple 2 - 2 chain. A very straightforward beginning that consists of 2 rings connected to 2 rings.
Close (2) 20ga 3.5mm ID rings and attach of piece of wire to make a handle.

STEP 2: Add 2 Rings
This is a classic 2-2 Chain. Open (2) new 20ga 3.5mm ID jump rings and add them to the starter ring.

STEP 3: Add 2 more
Open (2) new 20ga 3.5mm ID jump rings and add them to the previous rings.

STEP 4: One More Time
Open (2) new 20ga 3.5mm ID jump rings and add them to the previous set.
At this point you should have 4 sets of rings. The starter rings with (3) sets of rings attached.

STEP 5: Add 2 more rings to the starter
Open 2 new rings and attach them to the stater ring.

STEP 6: Add 2 More
Open 2 new rings and attach them to the previous ring.

STEP 7: Add 2 More Rings
Open 2 new rings and attach them to the previous ring.
At this point you should have two identical 2-2-2 chains connected from the starter ring

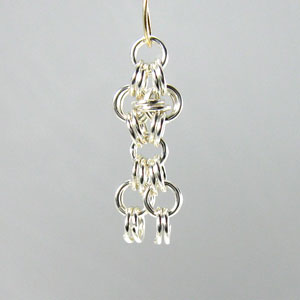
STEP 8: Link the Finish Ring
Open (2) new 20ga 3.5mm ID jump rings and connect the (2) rings from the left chain and (2) rings from the right chain to form a diamond shape.

STEP 9: Attach Smaller Ring to Center
Open (2) new smaller 20ga 3.0mm ID and connect the center rings [(2) rings from the center of the left chain and (2) rings from the center of the right chain] This will firm up the diamond or cross shape.

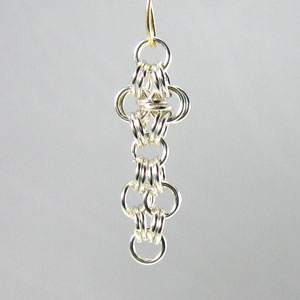
STEP 10: Next Cross, Left Chain
Add (6) new 20ga 3.5mm ID jump rings (2-2-2) to the bottom ring of the chain.

STEP 11: Next Cross, Right Chain
Add (6) new 20ga 3.5mm ID jump rings (2-2-2) to the bottom ring of the chain.
At this point you should have two sets of chain connected to the bottom ring.
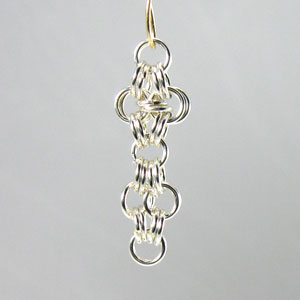
STEP 12: Complete the Diamond
Open (2) new 20ga 3.5mm ID jump rings and connect the (2) rings from the left chain and (2) rings from the right chain to form a diamond shape.
STEP 13: Attach Smaller Ring to Center
Open (2) new smaller 20ga 3.0mm ID and connect the center rings [(2) rings from the center of the left chain and (2) rings from the center of the right chain] This will firm up the diamond or cross shape
STEP 14: Repeat and Finish with Clasp
Repeat steps 10-13 until you reach your desired length. Add any style clasp to the end to complete.