Time to Complete: 1 hour
Final Length: Customizable
2 pairs of pliers
Clasp of your choice
16ga 6.5mm ID - 2 per inch
18ga 5.0mm ID - 4 per inch
18ga 4.5mm ID - 2 per inch
STEP 1: Materials
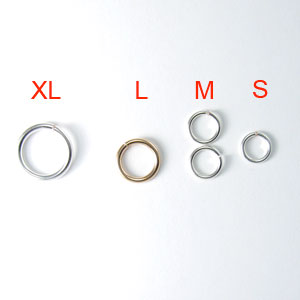
For this project, we use
x-large: 14ga 9.0mm ID
large: 16ga 6.5mm ID
medium: 18ga 5.0mm ID
small:18ga 4.5mm ID
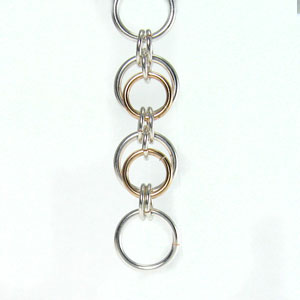
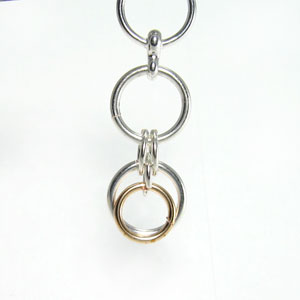
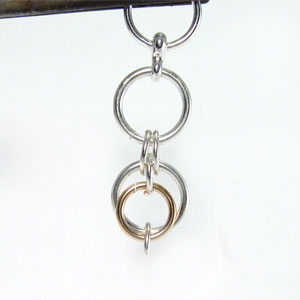
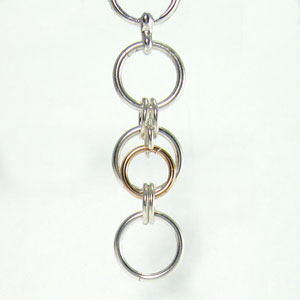
STEP 2: Start with a X-large Ring [Sun]
This chain is easier to build when hanging from a work lamp or cross-lock tweezers with base.
Attach a clasp to a x-large (14ga 9.0mm ID) ring. (Toggle clasp shown but you may substitute any style)
STEP 3: Add 1 of 2 Medium Rings
Open a medium (18ga 5.0mm ID) ring and attach it to the x-large ring.
STEP 4: Add 2 of 2 Medium Rings
Open another medium (18ga 5.0mm ID) ring and attach it to the x-large ring.
STEP 5: Attach an X-large Ring
Add a new x-large (14ga 9.0mm ID) ring to the existing two medium rings
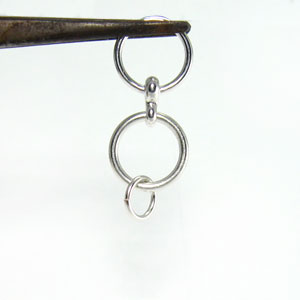
STEP 6: Add Small Ring in Between
Open a small (18ga 4.5mm ID) ring and attach it to the new X-large ring in between the medium rings.
STEP 7: Hanging the Moon
Attach the a large (16ga 6.5mm ID) ring to the small ring you added in step 5.
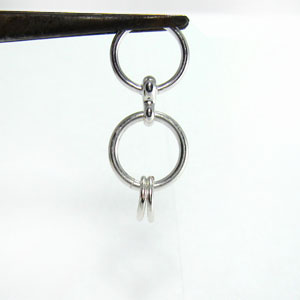
STEP 8: Add 1 of 2 medium Rings
Open a medium ring and connect the x-large [Sun] and large [Moon] together.
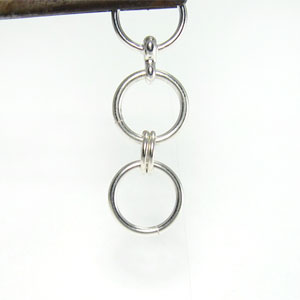
STEP 9: Add 2 of 2 medium Rings
Open a medium ring and connect the x-large [Sun] and large [Moon] beside the medium ring attached in the previous step.
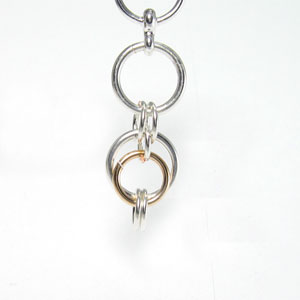
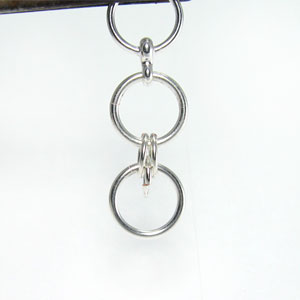
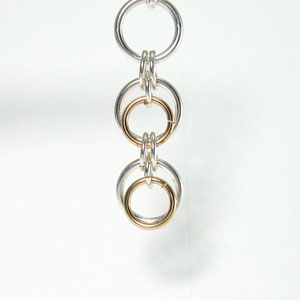
STEP 10: Add the Sun
Open a x-large ring and attach it to the (2) medium rings at the bottom of the chain.
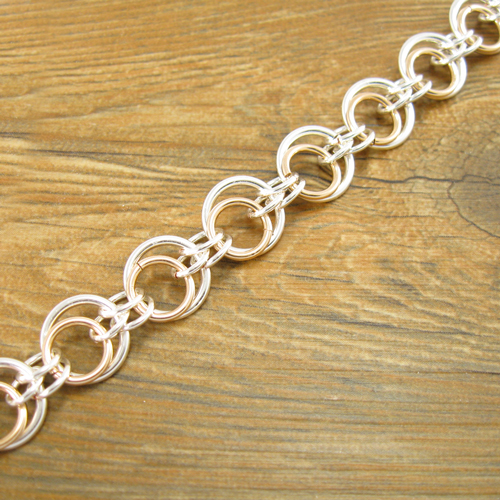
REPEAT...
Continue building the chain to length using steps 3 thru 9.
ALTERNATE METHOD...
We are going to show you an ALTERNATE method that looks tricky, but is faster to build the chain.
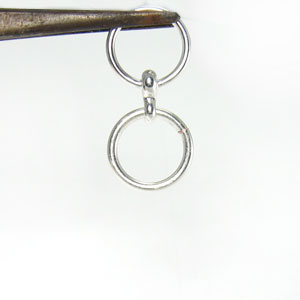
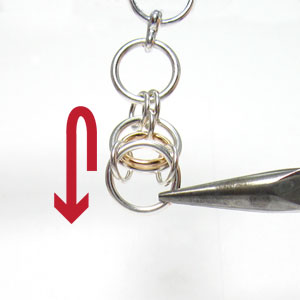
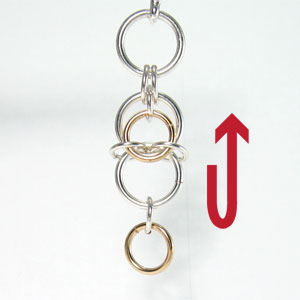
STEP 11: Invert the Sun
Slide the bottom ring (X-large) upward. This will cause the two medium rings at the top to separate. Let the x-large ring fall forward.
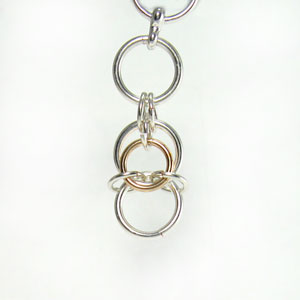
STEP 12: Invert the Sun - Review
The chain should look like this...
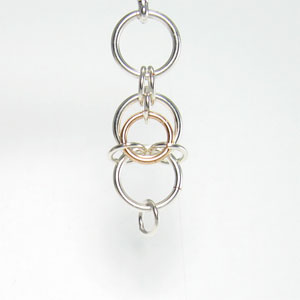
STEP 13: Add a Small Ring
Add small (18ga 4.5mm) ring to the bottom of the x-large ring.
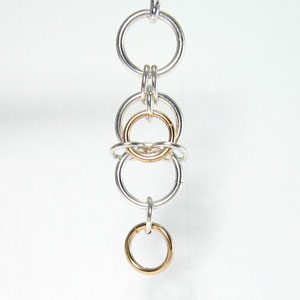
STEP 14: Add the Moon
Add a large (16ga 6.5mm ID) jump ring to the small jump ring.
STEP 15: Reverse the Sun
Reverse the procedure you performed in step 11. Bring the bottom of the x-large ring up and let it slide back into its original position
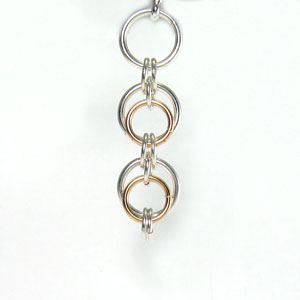
STEP 16: Check your work
If done correctly, the top of the Sun should have three rings with the Moon dangling from the center ring.
STEP 17: Add 2 medium Rings
Attach 2 new medium rings to the both sun and moon, x-large and large jump rings.
STEP 18: Add a new Sun
Attach a new x-large jump ring to the 2 medium rings on the bottom.
Go back to step 10 and repeat.