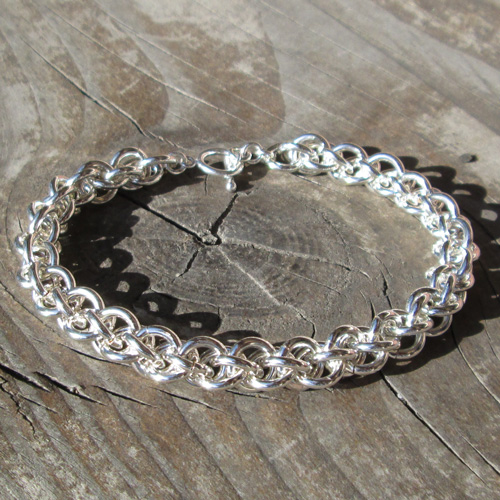
Time to Complete: 1-32 hours
Final Length: Customizable
2 pairs of pliers
Clasp of your choice
14ga 5.0mm ID - 10 rings per inch
16ga 4.25mm ID - 15 per inch
18ga 3.5mm ID - 20 per inch
20ga 2.75mm ID - 34 per inch
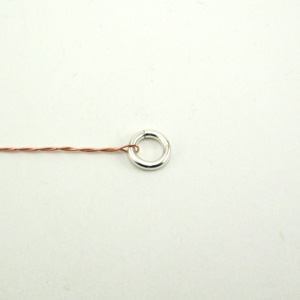
STEP 1: The Starter
Close a (14ga 5.0mm ID) jump ring. I recommend attaching a piece of scrap wire to help hold on to your project.
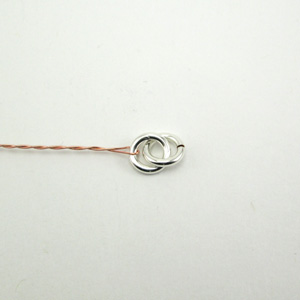
STEP 2: Add a New Ring
Attach a new (14ga 5.0mm ID) jump ring to the first ring.
Note the position of the two rings. Adjust them to match the picture before adding a ring in step 3.
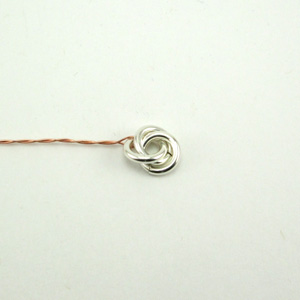
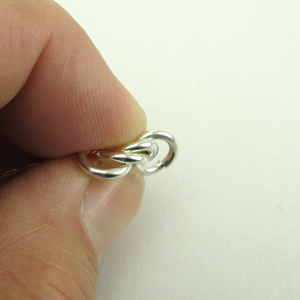
STEP 3: Add a Third Ring
Attach a new jump ring through the front of both existing rings. This should form a small flower. For an enlarged view, take a look at the Floret jump ring project.
STEP 4: Create the Stack
Organize the rings between your thumb and forefinger. Twist the last ring so that all three rings stack together. If they do not, flip the chain to the other side and try again.
Note: If your rings stack in the other direction, remove the last ring, go back to step 2, flip over the project, and reinsert the ring.

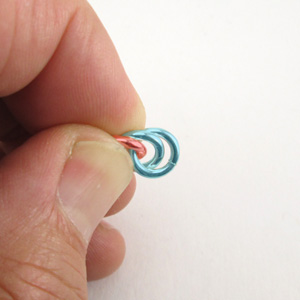
STEP 5: Identify Ring 1... 2 & 3
Each time you add a new ring, you will focus on the last three rings of the chain. New rings skip ring 1 (in red) and attach around rings 2 &3 (in blue).
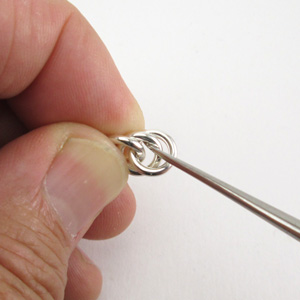
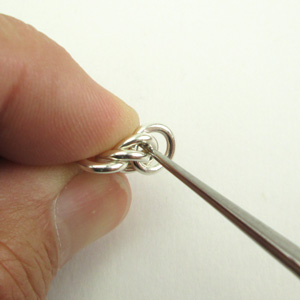
STEP 6: Add a New Ring
Locate the space between the 1st and 2nd ring and add a new jump ring.
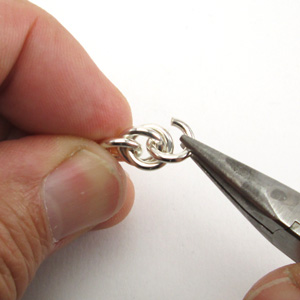
STEP 7: Capture Rings 2 & 3
You will notice extra space when adding the ring. This space will diminish as you add more rings.
STEP 8: Repeat - Stack the rings
Organize the chain until you get the last three rings to stack.
STEP 9: Identify the Target Opening, Add a Ring
Identify the last three rings. Open the space between ring 1 and ring 2 and add a new ring around 2 & 3.
Repeat steps 4 thru 7 to build your chain.
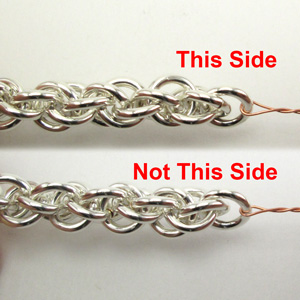
STEP 10: Right Side, Wrong Side.
When looking for the Stack, flip the chain over a few times. There is a subtle difference. On one side the last three rings stack. That is the correct side. On the other side, rings 2 and 3 stack, but rings 1, 2 and 3 will not.
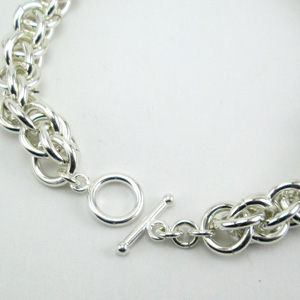
STEP 11: Add a Clasp
Build the chain to your target length. 14ga 5.0mm ID jump rings use approx. 10 rings per inch.
Depending on the gauge of the rings, you many need to add smaller rings to ling the chain to a clasp.