Time to Complete: 1-2 hours
Final Length: Customizable
2 pairs of pliers
Clasp of your choice
18ga 4.0 - 8-9 per inch
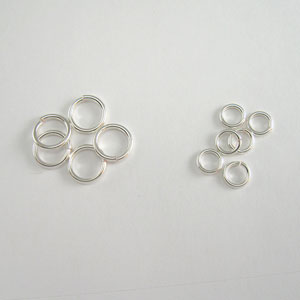
STEP 1: Materials
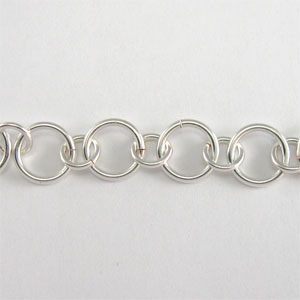
We are going to start this project making a simple 1 - 1 jump ring chain. A very straight forward beginning. There are steps you can take to speed up the process, but for now I think this is an easier way to learn the concept.
For this example, use 16ga 6.5mm ID - large jump ring, 18ga 4.0mm ID - small jump ring
STEP 2: Link together using alternating sizes
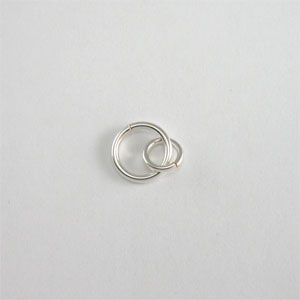
This is a classic 1-1 Chain. Link the large jump ring to the small ring alternating the pattern.
Speed Hint: Close all of the small rings first, then open the large jump ring to link the chain
STEP 3: Add new ring
Open a large ring and add it to the small ring.

STEP 4: Keep repeating the pattern
Continue adding rings until you reach the desired length of the chain
STEP 5: Begin building the Celtic Ring
Start in the middle of the chain. It is easier to handle and you can work your way out from the center. Add a small ring to the top of a large ring.
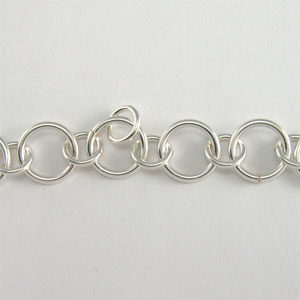
STEP 6: Add One Below
Add a small ring to the same large ring in step 5, but on the bottom.
STEP 7: Move Over One Ring
Add a new small ring to the next large ring to your right
STEP 8: Add the Bottom Ring
Add a new ring to the same large ring in step 7, on the bottom. The small rings should recreate a square with a ring in the center.
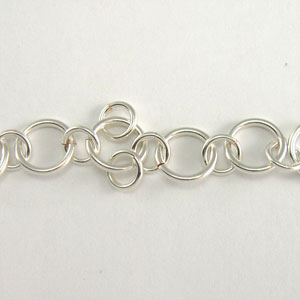
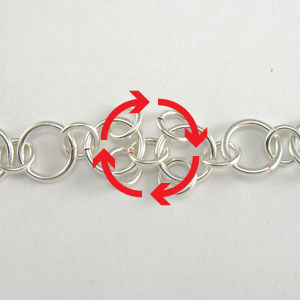
STEP 9: Insert a Large Ring
Open a new ring and insert it through the (4) small rings you added in steps 5 thru 8. The ring must be inserted through the small rings in a clockwise direction.
Top Left Ring: from the outside inward
Top Right Ring: from the inside outward
Bottom Right Ring: from the outside inward
Bottom Left Ring: from the inside outward
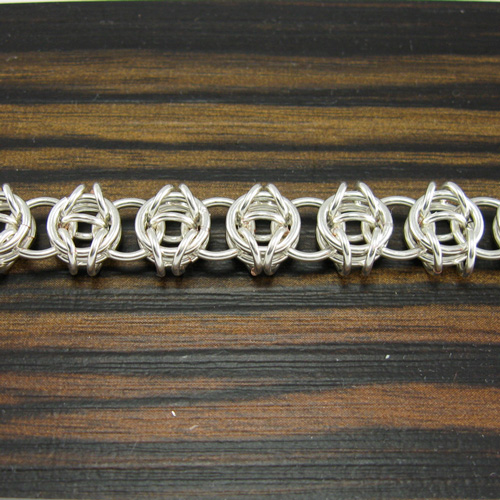
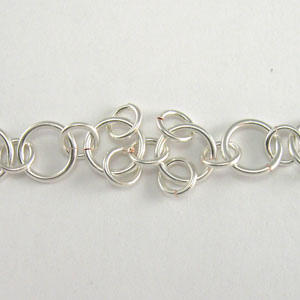
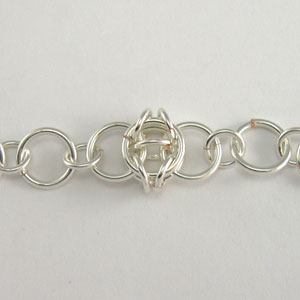
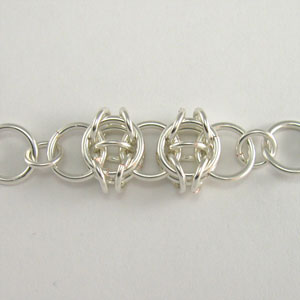
STEP 10: Examine the Rings
If done correctly the large rings should sit inside the small rings. Compare your work to the picture.
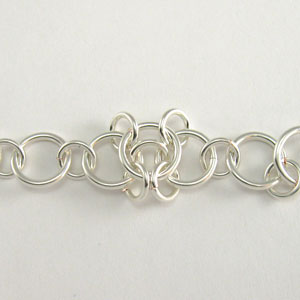
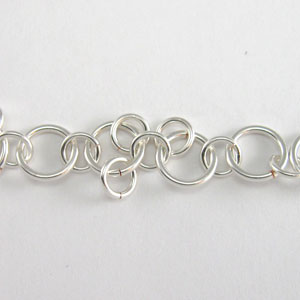
STEP 11: Flip the Chain, Add a Ring
Flip over the chain. Add a new large ring as you did in step 9. The small rings are now stabilized and it should be a little easier
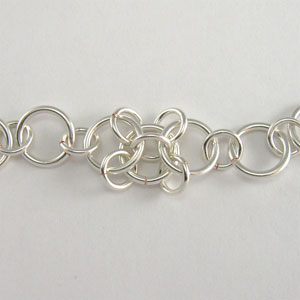
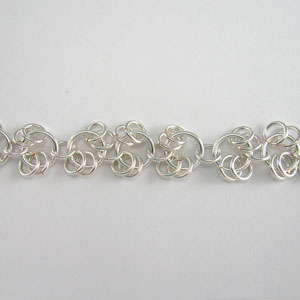
STEP 12: Celtic Section Complete
The large rings you added in step 9 and step 11 form a sandwich over the main chain. Notice how the small rings point together.
STEP 13: Let's Do it Again
Add (4) new small rings to the next set of existing large rings.
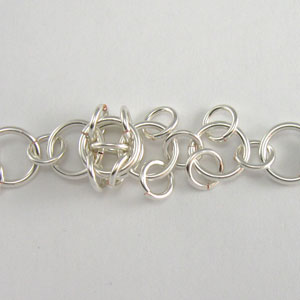
STEP 14: Add the Top Ring Clockwise
Open a new large ring and insert it clockwise through the (4) small rings
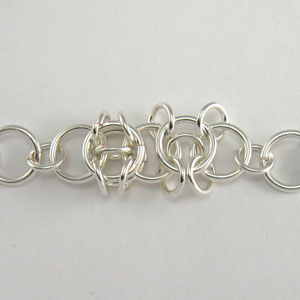
STEP 15: Flip the chain
Flip the chain over.
STEP 16: Add the Top Ring Clockwise
Open a new large ring and insert it clockwise through the (4) small rings
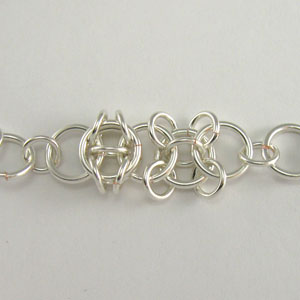
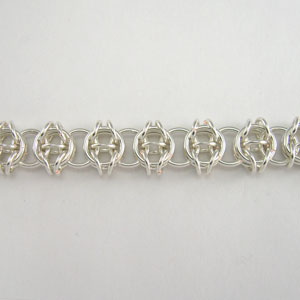
STEP 17: Continue the Process
Continue the process for the entire chain. For speed you can add all the large rings to one side, then the other.
STEP 18: Speed Up
A faster way to create this chain! Pre-close all of the small jump rings. Open a large jump rings and pick (5) closed small rings. Close the large jump ring. Open a new large jump ring and pick up (5) closed ring and thru (1) small ring from the previous group. Each time up add (5) and attach to the small ring on the previous group, make sure that it splits up the chain so that there are (2) rings on the top and (2) rings on the bottom. This will speed up the process