Time to Complete: 2-3 hours
Final Length: Customizable
2 pairs of pliers
3/8" Dowel
Masking Tape
Clasp of your choice
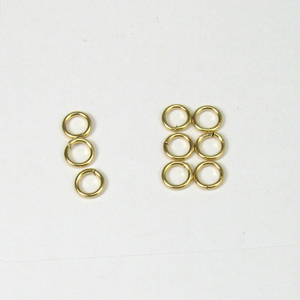
22ga 2.5mm ID
20ga 3.25mm ID
18ga 4.0mm ID - 36 rings per inch
16ga 5.25mm ID
14ga 6.5mm ID
STEP 1: The Starter
The easiest way to assemble this chain is to make a starter. You need a dowel (3/16" diameter) a piece of masking tape and (3) 18ga 4.0mm ID Jump Rings.
Close the three jump rings.

STEP 2: Stick 'Em
Press the 3 closed jump rings into the sticky side of the masking tape. Make sure at least half of the jump ring is visible above the tape.

STEP 3: The Roll
Attach the dowel to the edge of the tape. Make the end of the dowel equal with the tape, and roll the dowel so that the tape and jump rings are packed inside.

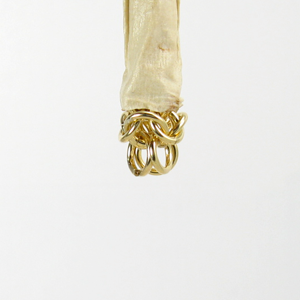
STEP 4: Looks Like This...
Press the tape firmly against the dowel and jump rings to secure them. Your finished starter should allow you to add jump rings to the starter jump rings.

STEP 5: The Triangle
The jump rings on the starter should form a triangle. You will be adding new jump rings, one each, the the corners of the triangle where the jump rings meet.

STEP 6: Starter Complete
Optional: Hang the starter from your work lamp or third hand to give you access to the chain.

STEP 7: Pair #1 - first new ring
Locate the point where two rings on the starter are touching. Open a jump ring and attach it to that pair.

STEP 8: Pair #2 - second new ring
Rotate the work to the next point where two rings from the starter touch. Add a new jump ring.

STEP 9: Pair #3 - last new ring
Turn your work and find the point where the rings from the starter touch, and add a new jump ring.
Row Complete!

STEP 10: Add a new row - new ring #1
You are going to repeat the steps 7, 8 & 9. But lets continue following the chain to reinforce what it should look like

STEP 11: Then ring #2, then ring #3
Find the point the the rings touch and add a new ring. Each row requires 3 new rings.
Note: The first several rows can be tricky. Make sure that your new ring only connect two rings and does not grab the previous row.

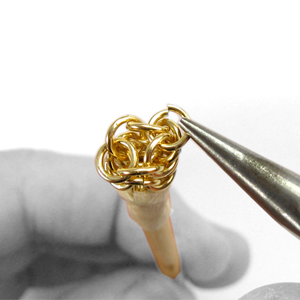
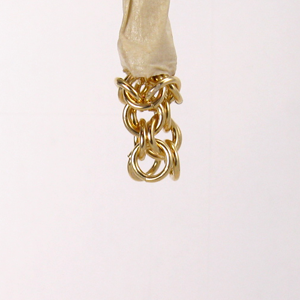
STEP 12: Start the Inverted Step
Ignoring the very first row [taped on to the dowel] You completed two rows (consisting of 6 rings) We are going to flip the chain and face it upward. Grab the neck of the chain with your thumb and forefinger and face it toward you.

STEP 13: Let the Rings Fall Open
Press your thumb and forefinger firmly around the chain to keep it stable. Let the rings fall open like the petals of a flower. You are going to add three new rings.

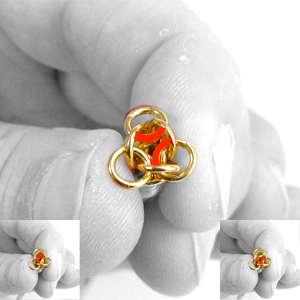
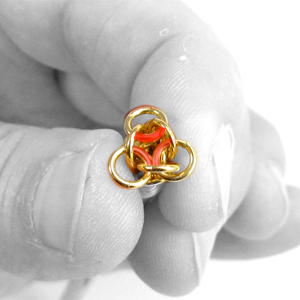
STEP 14: Identify the Inside
With the last row of jump rings open (petals), identify the inside portion of the jump ring. Seen here in red.
You will be adding a new ring to link the (red pair) rings together.
Note: The inset picture in the left and right corner identify the other pairs your will be linking.
STEP 15: Connect in 3 Places
Set aside 3 rings for this stage. Open a 18ga 4.0mm ID jump ring and attach it to the inside of the rings (identified in the previous step) and pull upward.
[Ring 1 of 3 shown]
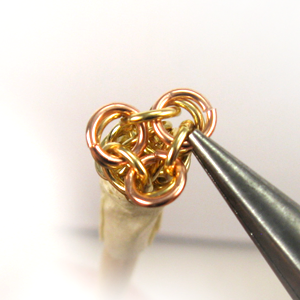
STEP 16: 3 Rings, 3 Places
After you attach the second and third ring, your chain should look like this. You have completed the inverted stage.
[copper rings denote new rings]
STEP 17: Continue the Chain
You can easily loose your place creating your first chain. If you prepare your rings in alternating piles of 3 and 6 rings, your will maintain the proper pattern.
STEP 18: Review
Hold the chain downward. The last three rings should be loose.
STEP 19: Add 6 Rings
Open (6) jump rings and add them to the chain to form two new rows (Steps 7-12)
STEP 20: Review - Identify the Inner
Flip the chain upward, letting the rings fall outward like petals and identify the inner portion of the ring.
STEP 21: Review - Add 3 rings
Add 3 rings to the inside

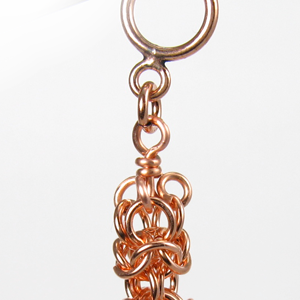
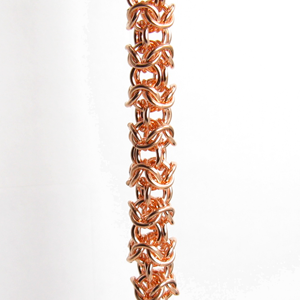
STEP 22: Complete Chain to Length
Repeat the steps, adding 6 rings, invert add 3 rings, repeat, until you reach your desired length.
STEP 23: Create a 3-to-1 Link
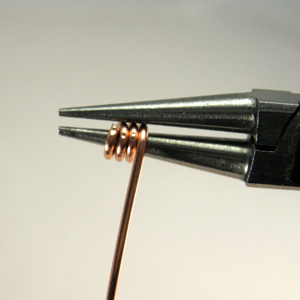
Ending a 3 sided chain can be challenging. Create a 3-1 link out of scrap wire.
Cut a length of 18ga wire approx 4 inches long. Use a round nose plier and create coil.
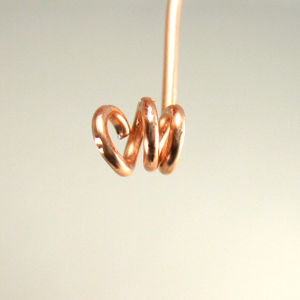
STEP 24: Separate the coils
Pry or Pull the coils apart. The wire may be very stiff.
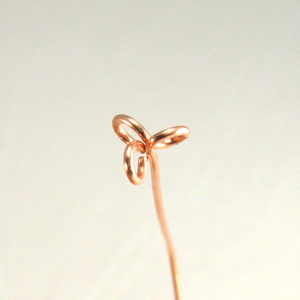
STEP 25: Bend to Triangle
Continue to separate the loops until they form a triangle.
STEP 26: Attach chain
Attach the last three rings of the turkish round chain to the 3-1. Create a loop and wrap on the other end.
Note: I end my chains with the inverted step. Then connect each ring, one at a time, to the 3-1 connector.